Showing posts with label Crafts. Show all posts

Wednesday, February 20, 2013

Duct Tape Flower #3 Tutorial

Here is another Duct Tape Flower Tutorial for you to enjoy! The center of this flower is exactly the same as our tutorial for A Small Duct Tape Rose, so if you know how to make that- then you will be golden when you make these!


What you Need:
Duct Tape
Wire
Wire Cutters
Scissors
Cutting Mat or Ruler


                                                                         Step 1:
Measure out a strip of Duct Tape 8 inches long 

Step 2:
Cut the tape in half so that you have 2 strips of 8 inches

Step 3: 
Cut about 1 inch by 1 inch squares from the 2 strips of tape

Step 4
Flip the a square over and fold one corner down so that you have an "L" of sticky side remaining

Step 5:
 Fold down the other corner so that you have a triangle with a base of exposed adhesive 

Step 6:
Continue doing this to all of your squares

Step 7:
Take one of your triangles and roll it so that it forms a cylinder shape. 
 

Step 8:
Begin to add the rest of the triangles onto your center. (Please excuse the awful looking nails- I almost went and repainted them just so that I could take this photo...but i didn't)
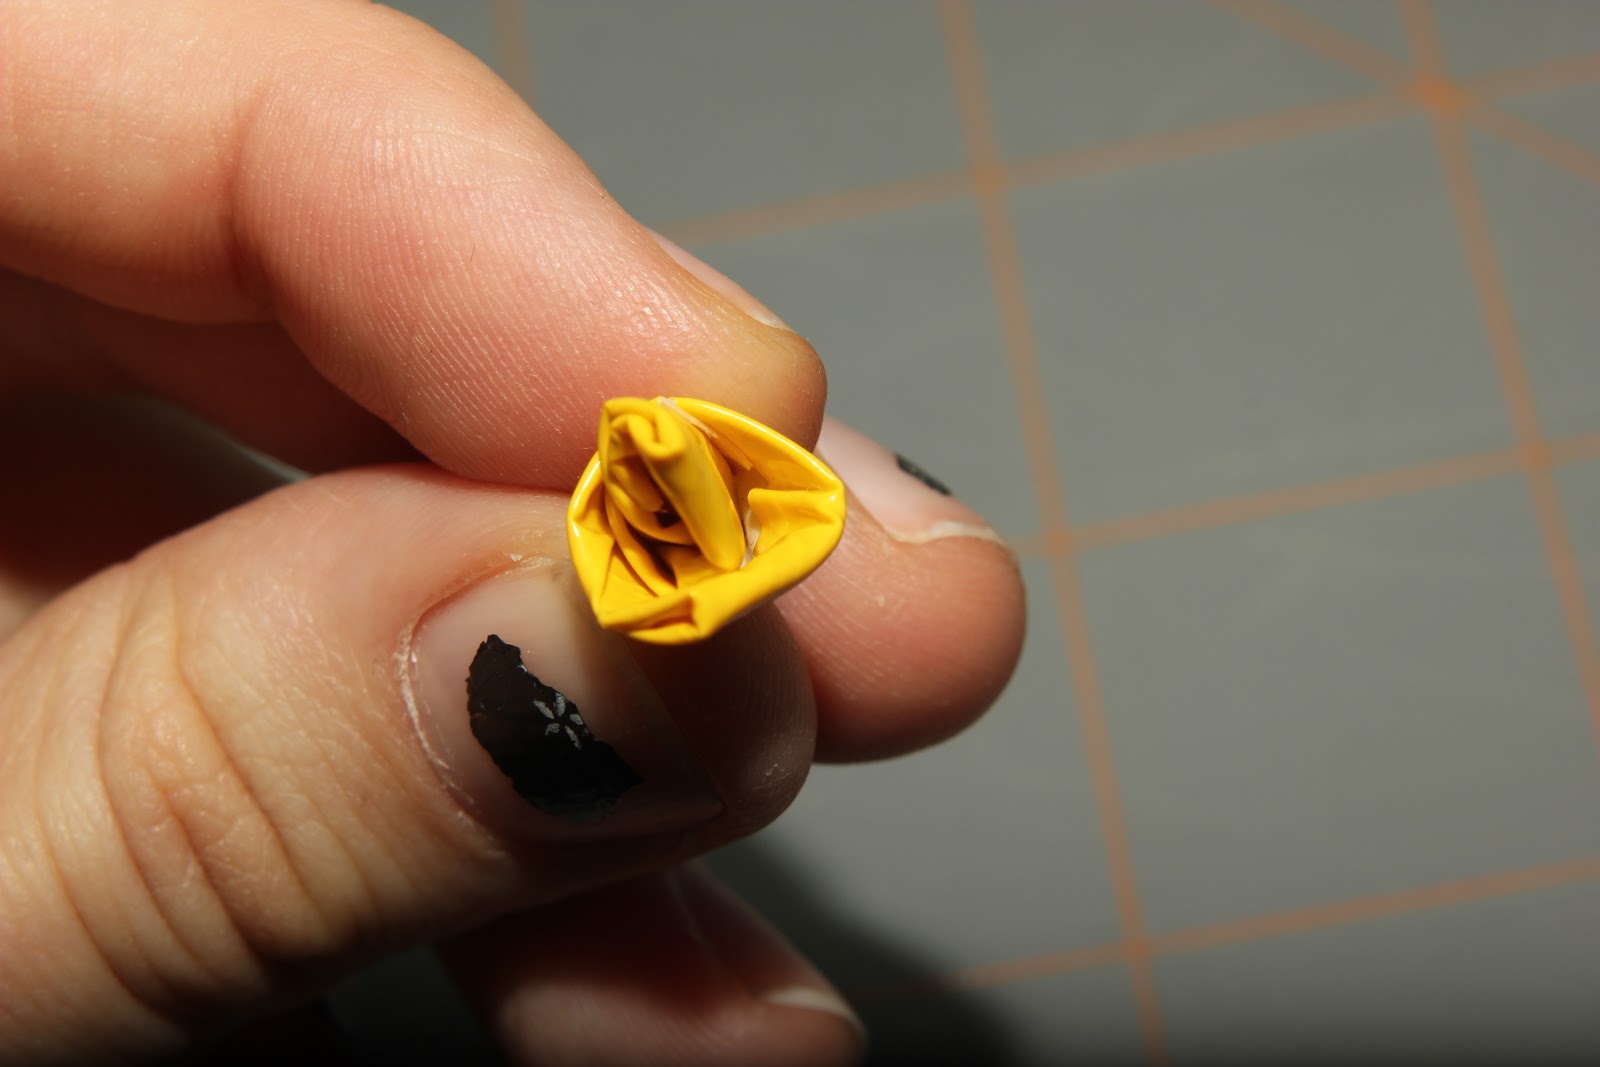
Step 9:
Add the remaining Petals/triangles on to get a small rose.

Step 10:
Set your center rose aside and cut 5 strips of tape about 7 inches long 

Step 11:
Cut 5 pieces of wire about 3 1/2 inches long and place one at the base of each strip of tape

Step 12:
Fold the tape in half over the wire- Your Edges do not need to be pretty as you will cut them next 
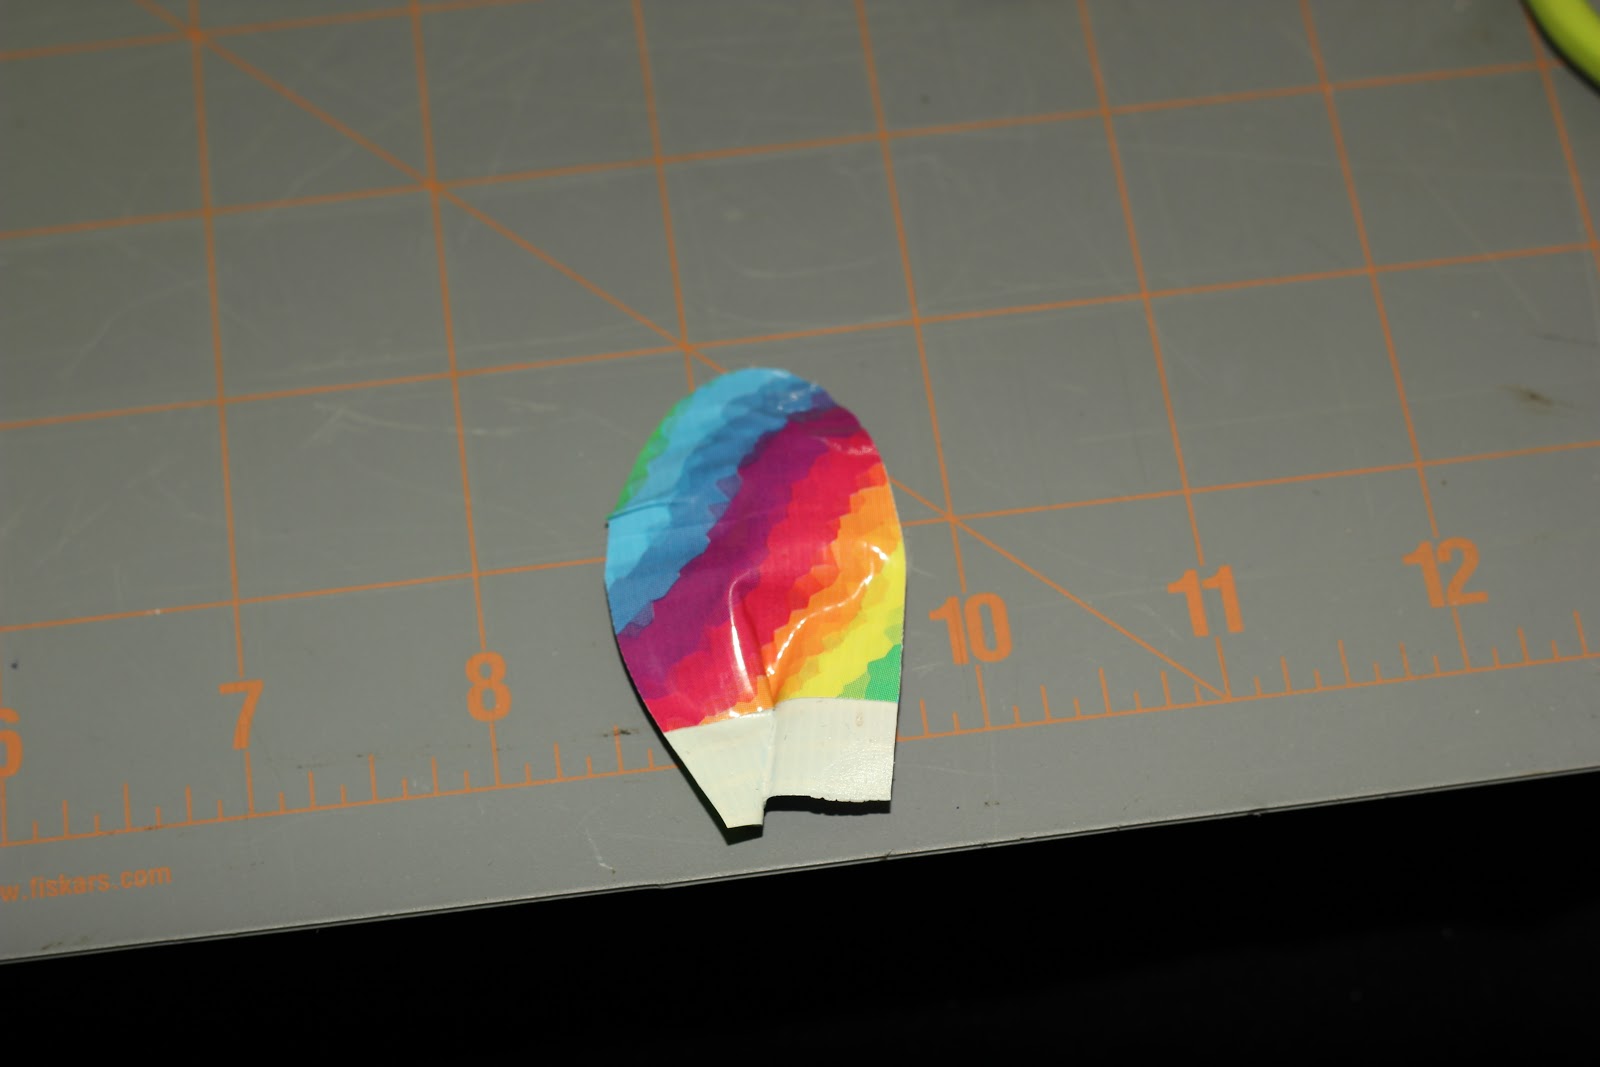
Step 13:
Cut a petal shape out of the duct tape leaving some adhesive at the bottom. Attach the petals to your center rose.
TADA! :) 

I hope your flowers turn out FANTASTIC! Feel free to send us photos or comments of how yours turned out! We would love to see them! 

~Sarah

Saturday, January 26, 2013

Duct Tape Flower Tutorial


We received so many positive results from our last Duct Tape Flower Tutorial, that I sat down this morning and did a second one! So here you go!!!


What You Need:
Duct Tape (I used 2 colors)
Scissors
Ruler or Cutting Mat


Step 1:
Cut 10 strips of duct tape about 4 inches long


Step 2: 
Fold the duct tape in have with a small lip of sticky hanging out.


Step 3:
Cut a petal shape out of the duct tape.


Step 4:
Make a crease in the center of the petals


Step 5: 
Atatch 5 of the petals together.


Step 6:
Now cut about a 2 inch piece of tape in the color you want to be your flower's center.
Step 7: 
Cut a circle out of the tape

Step 8: 
Add the remaining petals

There you go! I hope you have a fantastic time making this and if you are so inclined- feel free to send us an email with a picture of how yours turned out! :) We would love to see it! Leave a Comment Down below and let us know what you want to see next!

~Sarah

Sunday, April 15, 2012

I baked a cake

So today was 2 of my friends from churches birthdays. So what did I do? I baked a cake! I split it in half so that they each had a side... :) they loved it and it tasted really good! :) Barbara likes to garden so I filled her side with flowers and on Bob's side I put a tennis court with a tennis net made out of melted chocolates because he likes to play tennis. What do you think?! ;)

The completed cake

my shirt looked like when I was done decorating and baking... I was a mess! :)

Barbara's Side of the cake
Bob's side of the cake
A close up on the tennis net I made. It stood up in the frosting and was made out of melted chocolates.

Tuesday, March 13, 2012

New Dress!

I LOVE to sew! I love it! :) So when I first found Pinterest I feel head over heels in love with this dress! I finally made it! What do you think?! I LOVE IT! :)
The Front

The Back
I finally learned how to use Photoshop enough to twirl my face out! Yay! hehe!

The dress took me about 1 and 1/2 hours to make... not bad. I have never made any piece of clothing from start to finish all by myself and I did this time so I am very happy! I hemmed it too! :)  A first for many things! :) It was super fun and a wonderful learning experience! If you want more specifics let me know!

~Sarah

Saturday, March 10, 2012

Circle Bead Bracelet Tutorial

So I have a new tutorial for you!!! Wahoo! I pulled out one of my old designs and decided that you may like to see how I make it! I love this design! I used to wear it every day when I was around 7 years old. I designed it then. Its cute and easy!
Here is the finished product... :)


What you need:
Beads
Beading Thread
Scissors
A Clasp

To Start, cut a piece of thread 3 inches longer than 2x the length of your wrist.
To start thread 8 beads on to the center of your thread. Then take one of the ends of beads and thread it through the center of the last bead on the opposite thread. (Confusing language but look at the picture...) Make sure that your beads are in the CENTER of your thread otherwise your bracelet will be completely off!

Pull tight.
Next, Put 4 beads on one end of the thread and 3 on the other.
Like we did before, only this time it matters which one you stick through the center! Take the thread that has 3 beads on it and stick it through the 4th bead on the other thread.
Continue! At this point I realized that I did not want to be sitting there doing this all night because I was using seed beads and they were way to tiny. SO I did 3 of these circles and then moved on to E beads because they are bigger. You can do what ever you want- you can do them all small or all big or mix them up!
Here is my transition to the bigger beads. I like these ones better...they don't make as nice circles but I think that was just me. :) (just keep going)
I kept going with the big beads and then I switched back to the smaller ones so it would look like I did it on purpose.
Tada! All you need to do now is tie it off and add a clasp!

All Done!

So what do you think? Is there something else you want me to post about? Let me know!!! :)
Posted by Picasa

Friday, February 24, 2012

Small Duct Tape Rose Tutorial


So I previously posted pictures of my duct tapes flowers and someone commented saying they liked the small roses. So I made up this tutorial for you!

What you need:
  • Scissors or X-Acto Knife
  • Duct Tape
  • Ruler or Cutting Mat
  • Fingers

I used a X-acto Knife, and a cutting mat.

To Start- Rip/Cut a piece of Duct Tape off about 10 inches long


Cut the Strip of Duct Tape into about 1 inch by 1 inch squares


Fold the 1 corner of the duct tape on to the stick side so that it forms an "L" shape of sticky.


Fold the 1 of the stick sides onto the already folded duct tape. It will make a triangle of duct tape


Fold the rest of the Squares.


To start your duct tape rose, roll the 1 of the triangles into a cylinderish shape.


Keep adding petals around to form the flower. (It will take a few pictures for you to get your technique
mastered.)


Tada! You made a duct tape flower. To make a larger one, just make the squares bigger. Have Fun and Good luck!!!
Posted by Picasa